

Our services
Kitchen Island Seating and Layout Guide for Modern Homes
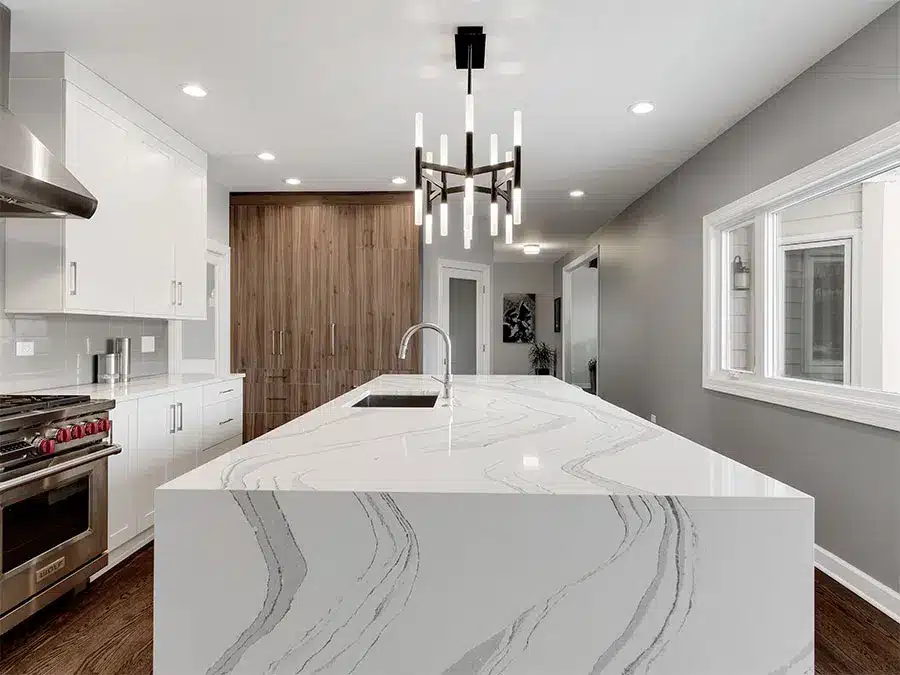
A kitchen island should make daily life easier, whether you use it to prepare dinner, share breakfast, or gather with friends. The right layout balances seating, storage, and workspace while leaving room to move comfortably around the kitchen.
For homeowners in Naperville and Chicago’s western suburbs, The Kitchen Master plans islands as part of a complete kitchen design. Start with how you want the space to work, then choose the dimensions and seating arrangement that support it.
Start With How You Will Use Your Island
Decide which activities matter most. An island used mainly for food preparation may benefit from a large, uninterrupted work surface. An island intended for meals needs comfortable seating and knee room. If you want both, keep the seating area clear of your primary prep zone and appliance openings.
Consider how many people cook together, where guests tend to gather, and whether you already have nearby dining space. Four comfortable seats may serve your family better than six stools squeezed into a busy walkway.
Choose a Seating Arrangement That Fits Your Kitchen
Seating Along One Side
A straight row works well when you want seating to face the kitchen while keeping guests outside the main work area. It can also preserve storage along the working side of the island. Longer rows are useful for casual meals, although conversation between people at opposite ends may be less natural.
Seating on Two Adjacent Sides
An L-shaped arrangement helps people face one another and can create a more conversational gathering spot. Plan the corner carefully: two seats meeting at a right angle can compete for the same knee space. This arrangement also needs enough clearance on both seating sides.
Seating Around One End
Concentrating seating at one end can separate meals and conversation from food preparation. A rectangular extension or rounded end may work well, depending on the room. Check that the seating does not block a doorway, refrigerator, or route to an adjoining room.
Plan Seating Width and Knee Room Together
The width assigned to each person and the clear space beneath the counter are separate measurements. The following commonly used NKBA planning benchmarks provide an initial reference for conventional seating. They are starting points, not a finished design or a substitute for project-specific accessibility planning.
| Counter height | Width per person | Clear knee depth |
| 30 inches | 24 inches | 18 inches |
| 36 inches | 24 inches | 15 inches |
| 42 inches | 24 inches | 12 inches |
Larger stools, armrests, individual comfort needs, and the way your household uses the kitchen may call for more space. Countertop thickness, support brackets, decorative panels, and legs can also reduce usable clearance. The Kitchen Master will be able to confirm the support requirements for the selected material and overhang.
How Much Island Length Do Three or Four Seats Need
Using 24 inches per person as an initial benchmark, three seats require 72 inches of usable seating frontage, and four require 96 inches. Those figures describe seating space, not a guaranteed overall island size. End panels, supports, wider stools, and seating at corners can increase the dimensions needed.
If your room cannot accommodate that length along one side, seating at an end may be an option. Your designer should test the full arrangement rather than count stools around a countertop outline.
Allow for Work Aisles and Traffic Behind Seats
Space between an island and working cabinetry serves a different purpose from space behind seated guests. Common NKBA planning benchmarks include a 42-inch work aisle for one cook and 48 inches for multiple cooks. For a route behind seated diners, 44 inches from the counter edge to the obstruction is a commonly used walking-clearance benchmark.
Actual layouts may need more room for mobility needs, appliance doors, busy circulation paths, or larger seating. Check refrigerator, dishwasher, oven, and cabinet openings in the plan. A drawing can look spacious while an open dishwasher door creates a bottleneck.
Match Your Stools to the Counter Height
A standard 36-inch countertop generally pairs with counter-height stools, while a 42-inch surface typically needs bar-height stools. Choose the actual seating before finalizing the design and check the distance between the seat and the underside of the countertop.
A lower seating area may be more comfortable for some household members. Accessibility also depends on clear approach space, knee and toe room, and individual needs; lowering the counter alone does not resolve every concern.
Keep Storage and Appliances Working Together
An island can provide drawers for cookware, concealed waste storage, or a place for small appliances. Plan storage around the tasks performed nearby, and check that handles and doors do not interfere with seating.
Adding a sink or cooking surface changes the design substantially. Plumbing, electrical work, ventilation where applicable, landing space, and separation from seated guests all need consideration. Sometimes an uninterrupted island surface is the more useful choice.
When a Peninsula May Be the Better Fit
A peninsula connects to a wall or another run of cabinetry. In some kitchens, it can provide seating and prep space without requiring circulation around every side. If an island would crowd work aisles or doorways, compare both options before committing to a layout.
Plan Your Island as Part of the Whole Kitchen
The Kitchen Master develops kitchen layouts, detailed plans, and 3D renderings to help you understand the relationship between cabinetry, appliances, seating, and adjoining rooms. Our planning process considers selections and construction details together so important decisions can be addressed before work begins.
If you are planning a kitchen remodel in Naperville or the western Chicago suburbs, contact The Kitchen Master to arrange an introductory meeting at our Naperville showroom.
Categories : Kitchen Design & Remodeling
free guide to Popular Kitchen Layouts
Get closer to the kitchen of
your dreams!
7 Custom Kitchen Designs for Renovation Inspiration
At The Kitchen Master, we’ve helped hundreds of clients create custom kitchens to make their homes more attractive, functional and inviting. Consider some of the following ideas as you plan your renovation to create the kitchen you’ve always imagined. 1. Practical and stylish cabinetry can enhance any kitchen. Kitchens with… Read more
View latest blog posts
Award-Winning Designs & Service





X
CLIENT LOGIN