
Our services
Top Kitchen Remodeling Mistakes Naperville Homeowners Make
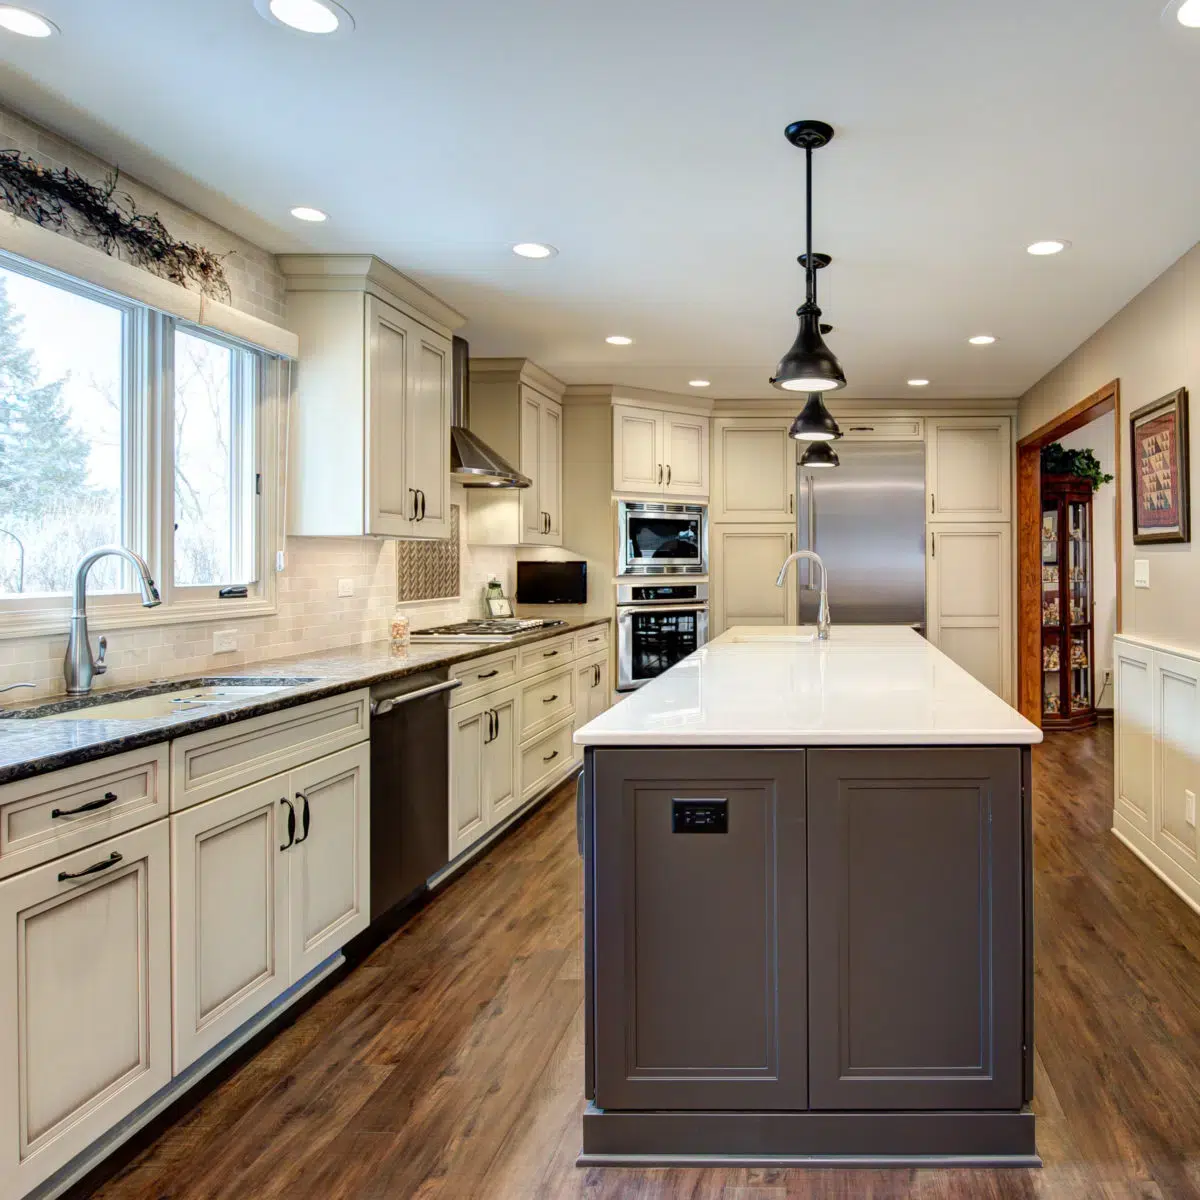
A kitchen makeover in your Naperville home can transform how you cook, entertain, and spend time with family. Yet even small oversights during planning can turn an exciting project into a headache. From underestimating material costs to not meeting storage needs, you’ll want to steer clear of common mistakes. Our team at The Kitchen Master in Naperville, IL, has helped dozens of local families navigate every decision, from layout options to finish details.
Overlooking Traffic Flow
When preparing for a kitchen makeover, you might fixate on cabinet style or countertop color and miss how people will move through the space. A cramped cooking station next to an island can lead to bumping elbows during meal prep. You’ll spend more time sidestepping than stirring if your stove, sink, and refrigerator sit too far apart or block one another. Imagine carrying a heavy pan from the cooktop to the sink only to find yourself weaving around a breakfast bar.
To avoid that frustration, sketch your daily routine in the room. Note where you tend to grab ingredients, where you prepare ingredients, and where dishes end up. Adjust island placement to give at least 42 inches of clearance on busy sides. A carefully mapped flow keeps breakfast lines moving, reduces the chance of spills, and transforms your kitchen into a space where cooking feels effortless.
Misjudging Storage Requirements
It’s easy to picture a sleek, minimalist kitchen only to realize you have no cupboards that are deep enough for your stand mixer or large pots. You may end up stacking storage containers in an awkward corner or shoving seldom-used gadgets in the backs of cupboards. Finding the items you need can quickly become a challenge if you’re not considering the storage you need.
Start by emptying your current cabinets and tallying every baking sheet, mixing bowl, and spice jar that you have. Group items by frequency of use and look for unused nooks, perhaps a wide drawer under the cooktop or shallow cabinets above the fridge. Pullout trays and adjustable shelving maximize every inch while keeping your most-used tools at hand. Consider a dedicated spice drawer near the stove and a deep drawer for pans next to your oven. Accessory organizers for utensils cut down on clutter. With a precise storage blueprint, you’ll find the right location for all your kitchen essentials. This helps you avoid wasted space or endless searches for that elusive lid.
Compromising on Material Quality
Choosing the cheapest countertop or cabinet hardware might seem like a quick way to stay under budget. However, cutting corners can cost more when items start to crack, warp, or stain easily. Imagine a beautiful laminate surface that bubbles after a week of use or cabinet doors that hang unevenly as hinges wear out. Initial savings vanish as repair invoices and replacement costs add up.
Instead, balance your budget by researching wear patterns in your home. If you cook daily and love hosting, invest in a quartz or solid-surface top that resists heat marks and spills. Chose plywood-box cabinets rather than particleboard to withstand years of opening and closing. Choose soft-close hinges and drawer glides rated for thousands of cycles so they don’t sag or squeak within months. A few extra dollars per square foot can translate into decades of trouble-free use. That long view saves money in the long run, even if you stretch your budget a bit today to secure materials that live up to the demands of real life.
Underestimating Lighting Impact
Natural light can brighten a kitchen. However, relying solely on a window above the sink leaves corners in shadow. You may end up squinting while chopping vegetables or hunting for utensils in dusk-like cabinets. Overhead fixtures alone cast harsh shadows on counters and produce glare on glossy surfaces.
Layered lighting solves that problem. Task lighting under upper cabinets puts focused beams on areas where you prepare food so you can see what you’re doing. Pendant lamps over an island add style but also ensure that midday snacks don’t happen in half-light.
Dimmable recessed fixtures let you soften brightness for casual breakfasts. Consider toe-kick lights that cast a soft glow across the floor, perfect for midnight fridge raids without waking everyone in the house. Consulting an electrician early lets you run wiring to every desired location before the project is finishing up. Thoughtful light placement transforms a functional cooking space into a warm, welcoming environment that adapts to every moment of your day.
Ignoring Ventilation and Airflow
A gleaming range hood in the showroom can look like a design statement, but it must work hard to clear smoke, steam, and cooking odors. Without proper venting, grease settles on cabinets, moisture breeds mildew in hidden corners, and lingering smells become a problem.
Start by sizing your hood to match your cooktop’s breadth and output. A four-burner cooktop blasting stir-fry needs a hood rated for at least 600 cubic feet per minute, while a standard set of burners may only require half that. Ducted venting to the exterior outperforms recirculating models by whisking heat and humidity directly outside. Position the hood at the correct height, generally 24 to 30 inches above the cooking surface, to capture rising vapors before they spread. Working with a qualified HVAC professional ensures that duct runs maintain the right pitch and airflow. Effective ventilation preserves your finishes, protects indoor air quality, and helps your kitchen feel fresh.
Neglecting Professional Input and Project Phases
DIY inspiration from online tutorials can tempt you to skip expert advice. However, electrical work, gas hookups, and structural changes carry legal and safety considerations. You might finish framing a breakfast nook only to learn local codes require fire-rated materials or proper egress for a new window. This misstep can halt permits and add days to your timeline as you rework an area.
Consult a design-build team early to coordinate trades and pull the correct permits. A professional designer helps you translate wish-list items into a coherent plan that aligns with building codes. Your electrician, plumber, and carpenter collaborate from the start, so electrical rough-ins happen before drywall, gas lines land in the right spot, and cabinets go up on reinforced walls.
Phased project management keeps each trade working in sequence rather than bumping into one another. You avoid standing around waiting for a plumber to finish so the tile can be installed. Clear scopes of work and detailed schedules give you predictability in cost and timing. Relying on professional oversight reduces surprises and delivers a kitchen remodel that flows smoothly from demolition to the first dinner party.
Finishing Touches and Next Steps
After ironing out the big decisions, like cabinet placement and countertop choice, focus on the details that bring everything together. Whether you need precise plumbing adjustments for a new sink, expert electrical work for under-cabinet lighting, or custom cabinetry to maximize corner spaces, our team covers it all. We also offer flooring installation and backsplash tiling to complete your kitchen’s look. When you’re ready to bring your vision to life without the stress of avoidable errors, give The Kitchen Master in Naperville a call today to schedule your remodel consultation.
Categories : Kitchen Design & Remodeling
free guide to Popular Kitchen Layouts

Get closer to the kitchen of
your dreams!
7 Custom Kitchen Designs for Renovation Inspiration
At The Kitchen Master, we’ve helped hundreds of clients create custom kitchens to make their homes more attractive, functional and inviting. Consider some of the following ideas as you plan your renovation to create the kitchen you’ve always imagined. 1. Practical and stylish cabinetry can enhance any kitchen. Kitchens with… Read more
View latest blog posts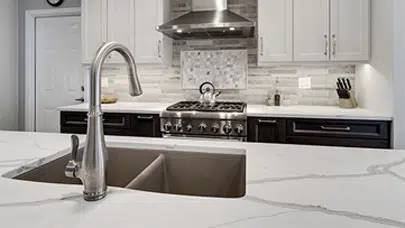
Award-Winning Designs & Service


X
CLIENT LOGIN